
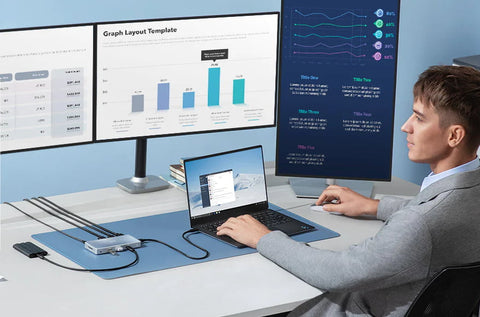
Using an HDMI (High-Definition Multimedia Interface) connection is one of the most efficient ways to display high-quality video and audio from your laptop onto an external monitor, projector, or television. HDMI simplifies the connection process by using a single cable for both video and audio, eliminating the need for multiple cables and extra configuration.
Whether you're preparing for a presentation, setting up a second screen for multitasking, or simply enjoying entertainment on a larger display, knowing how to switch to HDMI on laptop properly ensures a smoother and more effective experience.
Methods for Connecting HDMI to Laptop
Let’s get into the main steps for switching to HDMI on a laptop, whether you’re connecting directly or managing multiple devices through a shared display.
Direct Connection
Connecting your laptop to an external monitor or TV using an HDMI cable is a simple and effective method. All you need is an HDMI-compatible laptop and a functional HDMI cable. Follow these steps:
- Make sure both your laptop and the external display are powered off.
- Insert one end of the HDMI cable into your laptop’s HDMI port.
- Plug the other end into the HDMI port on your external monitor or television.
- Turn on your laptop, followed by the external display.
Most laptops will automatically detect the external screen. If the image doesn’t appear right away, you can manually adjust your display settings in the system settings or control panel.
Using an HDMI Switch
An HDMI switch allows multiple HDMI-enabled devices to share a single display. If you're looking to connect more than one device—like a laptop, game console, or streaming stick—to the same screen, an HDMI hub offers a clean and efficient solution.
Here’s how to connect your laptop using an HDMI switch or hub:
- Plug your HDMI devices into the input ports on the HDMI switch.
- Connect the switch’s output port to your display’s HDMI input.
- If the switch requires external power, connect it to a suitable power source.
- Use the switch’s selector button or remote (if included) to choose the HDMI input you’d like to display.
Understanding HDMI Connection
HDMI has been a mainstay in digital connectivity since its launch in 2002. Knowing how to switch to HDMI on a laptop has become a practical skill in workplaces and learning environments alike. It’s worth familiarising yourself with how it works—even for students who may use it during presentations or collaborative projects.
Explanation of HDMI
HDMI, or High-Definition Multimedia Interface, represents a significant advancement in how we connect devices for audio and video transmission. Beyond simplifying the setup process, it greatly improves the quality of the media being shared.
Before HDMI became common, people often relied on VGA (Video Graphics Array) connections, which could only carry video. To get sound, a separate audio cable—usually a 3.5 mm jack—was needed. HDMI resolved this by combining high-definition video and audio in one streamlined cable. This made connections neater and enhanced both sound and picture quality.
HDMI supports a wide range of resolutions, from standard definition right up to 4K and even 8K, depending on the version. This makes it suitable for everything from watching films and gaming to delivering presentations with sharp visuals.
Advantages of Using HDMI
Below are several reasons why HDMI stands out among other connection types.
- Delivers both high-definition video and audio, giving you superior image and sound quality in one cable.
- Offers broad compatibility across modern electronics such as mobile phones, gaming consoles, projectors, and home theatre systems.
- Maintains signal quality, as it transmits uncompressed digital content—unlike some analogue formats that may suffer from interference.
- Supports Consumer Electronics Control (CEC), which allows you to control several connected devices using a single remote, making setup and everyday use more convenient.

Configuring HDMI Output on Your Laptop
When connecting a laptop to an external screen via HDMI, properly adjusting the output settings is key to achieving the best performance. The steps below will help ensure the setup works smoothly from the start.
Accessing Display Settings
To begin configuring HDMI output, open your laptop’s display settings.
- On Windows, right-click on the desktop and choose “Display settings” from the menu.
- On macOS, click the Apple menu, go to “System Preferences” (or “System Settings” on newer versions), then select “Displays”.
From here, you can manage how your laptop interacts with the external screen. You may want to extend your desktop across both displays, mirror your screen, or set the external monitor as the primary display, depending on your setup and usage.
Changing HDMI Input on External Display
Once your laptop settings are in place, you may need to manually select the correct input source on your external monitor or TV. This is usually done through the “Input” or “Source” menu on the display itself.
Using your display’s remote control or onboard navigation buttons, scroll through the input options and choose the HDMI port connected to your laptop. Once selected, your laptop’s display should appear on the external screen, indicating a successful connection.
Troubleshooting and Helpful Tips
Connecting your laptop to a larger screen like a monitor or television via HDMI can greatly enhance your viewing experience. However, occasional technical hiccups may occur. Being familiar with common issues and how to address them will help maintain consistent performance.
Common Issues
- Display not detected:If your laptop doesn’t recognize the HDMI connection, double-check that both ends of the cable are firmly connected to the laptop and external display.
- Flickering or resolution errors:These can often be resolved by adjusting your display settings. On Windows, right-click the desktop and select “Display settings” to recalibrate the resolution or refresh rate.
- Audio playing through laptop speakers:If the sound is not transmitting through your external display, go into your laptop’s Sound settings and select the HDMI-connected device as the audio output.
Tips for Optimal Performance
- Use a high-quality HDMI cable to prevent signal issues or lag.
- Keep your graphics drivers up to date to ensure proper hardware compatibility and improved video quality.
- Test all available HDMI ports if your laptop has more than one, to find the most stable connection.
- Adjust display resolution and scaling to match the external monitor’s capabilities and your personal preference.
- Check for firmware updates for your laptop and external display to enhance device compatibility and system stability.
Key Considerations Before Using HDMI with a Laptop
Before making the connection, a few essential factors should be reviewed to ensure a smooth setup:
1. Compatibility
Not all laptops come with a built-in HDMI port. Some models, especially thinner or newer ones, may only support USB-C or Thunderbolt video output. In such cases, you’ll need a compatible HDMI adapter or docking station to complete the connection.
2. Display Resolution and Quality
When using an external monitor, pay attention to its resolution. High-resolution displays, such as 4K monitors, may require specific HDMI cables (e.g. HDMI 2.0 or above) for proper performance. Also, ensure that your laptop’s graphics hardware can support the desired resolution and refresh rate without lag or scaling issues.
Conclusion
Now you know how to switch to HDMI on laptop computers. Using HDMI with a PC comes with several practical advantages. It can enhance your viewing experience when watching a favourite series or live performance. It’s also useful for video conferencing, presentations, or working on design projects. Learning the steps early can save time later—give these steps a try and make the most of what HDMI connectivity offers.
FAQs
How do I turn on HDMI on my laptop?
Start by plugging the HDMI cable into both your laptop and external monitor. Then, navigate to your system's display settings and select "Detect" or choose the appropriate screen mode (e.g. Extend or Duplicate). Adjust the resolution and set the external display as primary if needed.
How do I change my monitor to HDMI?
Connect an HDMI cable from your monitor to your laptop or desktop. Then, go to your computer’s display settings and select the HDMI-connected monitor as your main display. Adjust resolution or orientation as needed. If the monitor doesn’t auto-switch, use its menu or input button to manually select the correct HDMI source.


Save Up to $20 or Get 15% Off
Already signed up?
